Automating Email Workflows with Google Cloud Application Integration, Pub/Sub and Send Mail task
Introduction & Objective
Sending emails may sound simple — we do it every day. But when you’re building enterprise systems and workflows on Google Cloud Platform (GCP), sending emails automatically when something happens (like an event or a trigger) isn’t as easy as clicking “Send.”
Let’s say you want to send an email when:
- A system detects an error.
- A document is uploaded to Cloud Storage.
These are common needs in modern cloud applications. But here’s the problem: Google Cloud Platform doesn’t offer a built-in, native service for sending emails directly from workflows or triggers. That means, until now, if you wanted to send an email as part of a business process or automation, you’d have to:
- Write custom code,
- Set up an external email service like SendGrid or Mailgun,
- Or use third-party platforms and APIs — which adds complexity and extra management.
This has been a long-standing challenge for developers and teams using GCP.
But now, Google Cloud’s Application Integration brings a powerful solution. With this integration tool, you can build workflows that listen for events using Pub/Sub (Google’s messaging system) and send emails using built-in Send Mail tasks — without writing complex code or managing separate email services.
In this article, we’ll explore:
- The problem of native email delivery on GCP,
- How Application Integration helps solve it, and
- How you can use Pub/Sub + Application Integration + Send Mail to build your own event-driven email workflows in a clean, manageable way.
Whether you’re new to GCP or looking to streamline your automation processes, this guide will help you understand and implement a simple, scalable solution for automated emails in your cloud environment.
Pre Requisites
The pre requisites for this tutorial is very simple. You need to have a Google Cloud Platform account and enbale the pub/sub and application integration APIs.
gcloud services enable pubsub.googleapis.com integrations.googleapis.com
You also need to have a service account with the following roles:
- Pub/Sub Publisher
- Application Integration Invoker
You can create a service account and grant the necessary roles using the following gcloud commands:
gcloud iam service-accounts create email-automation-sa --display-name="Email Automation Service Account"
gcloud projects add-iam-policy-binding YOUR_PROJECT_ID --member="serviceAccount:email-automation-sa@YOUR_PROJECT_ID.iam.gserviceaccount.com" --role="roles/pubsub.publisher"
gcloud projects add-iam-policy-binding YOUR_PROJECT_ID --member="serviceAccount:email-automation-sa@YOUR_PROJECT_ID.iam.gserviceaccount.com" --role="roles/integrations.invoker"
Step-by-Step Guide
1. Create a Pub/Sub Topic
First, we need a Pub/Sub topic to which we can publish events.
gcloud pubsub topics create email-automation-topic
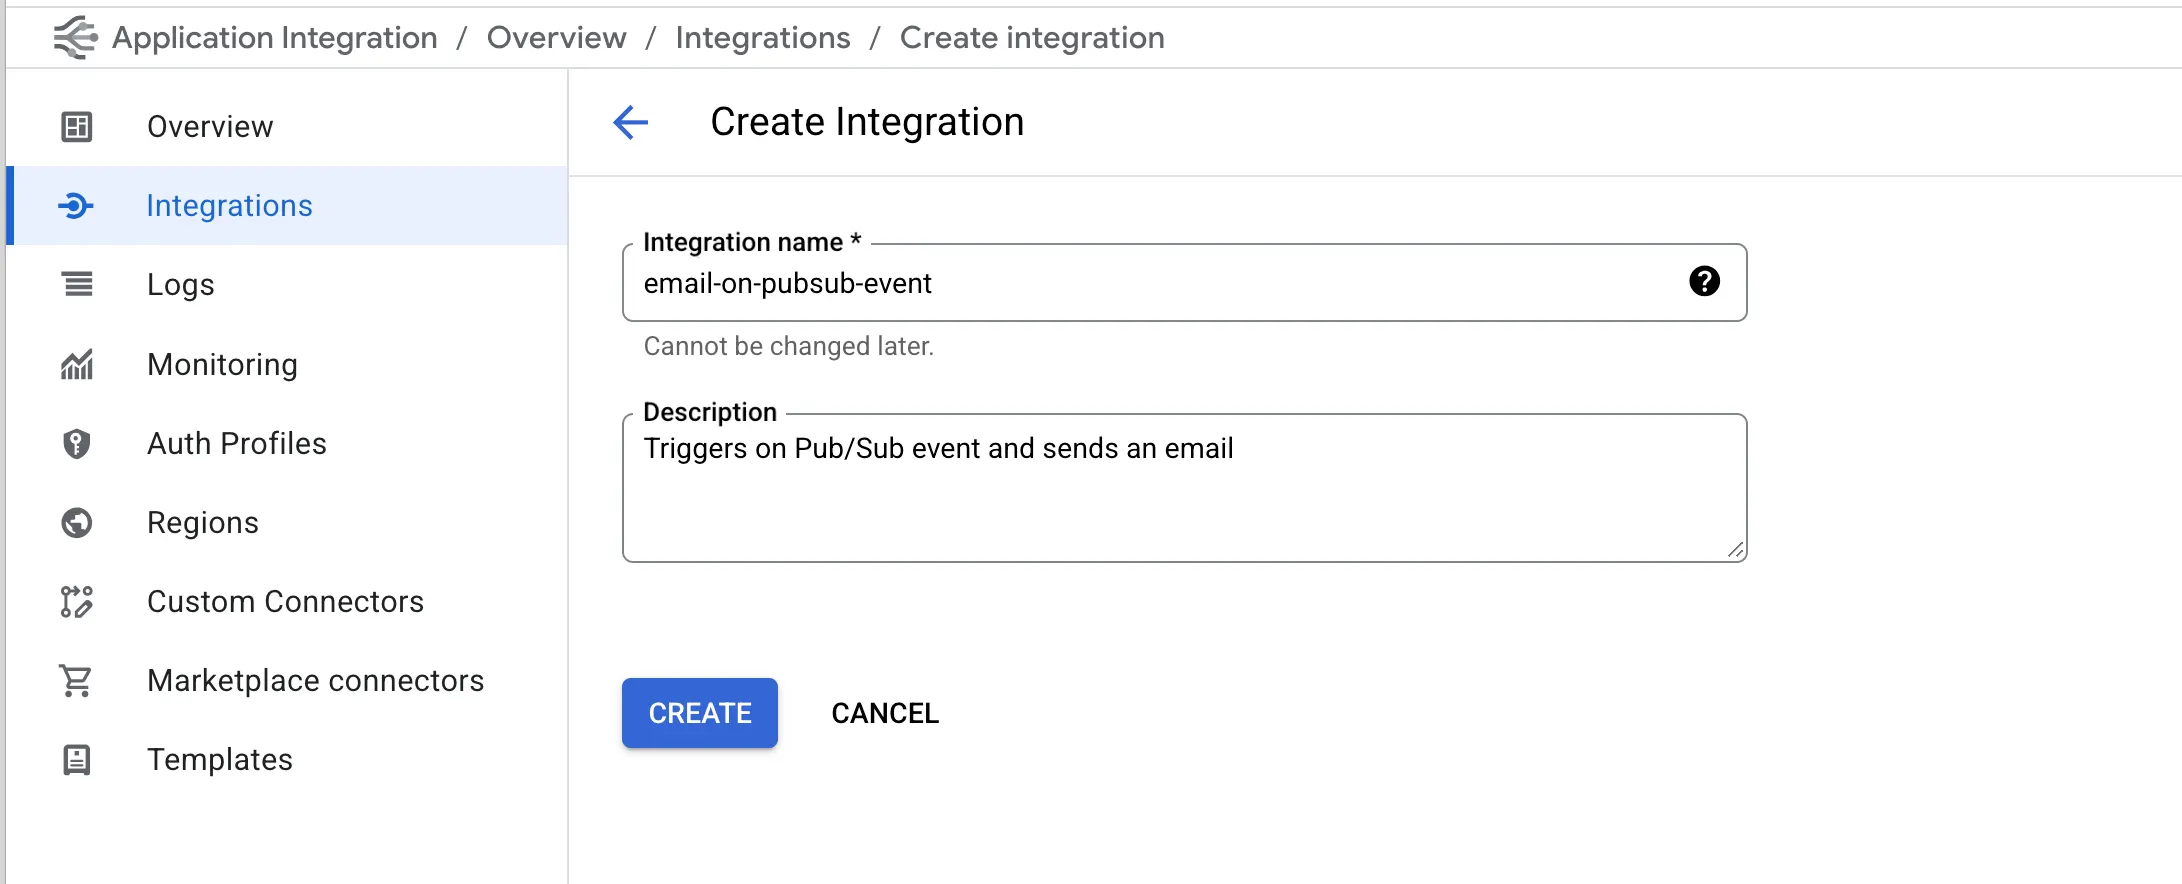
2. Create an Application Integration
Now, let’s create the Application Integration workflow.
- Go to the Application Integration page in the Google Cloud Console.
- Click on "Create Integration".
- Give your integration a name, for example, "send-email-on-event".
- Select the region where you want to deploy your integration.
- Click "Create".
3. Configure the Pub/Sub Trigger
Next, we need to configure the integration to be triggered by a Pub/Sub message.
- In the integration designer, click on "Add a trigger".
- Select the "Pub/Sub" trigger.
- Select the Pub/Sub topic you created in the step #2 ("email-automation-topic").
- Click "Done".
Your integration will now be triggered whenever a message is published to the "email-automation-topic" topic.
4. Add the Send Mail Task
Now, let’s add the "Send Mail" task to the integration.
- Click on the "+" icon in the integration designer to add a new task.
- Select the "Send Mail" task.
- Configure the task with the following parameters:
- To: You can hardcode an email address or use a variable from the Pub/Sub message. For this example, we will use a variable.
- Subject: You can also use variables in the subject.
- Body: The body of the email. You can use HTML and variables here as well.

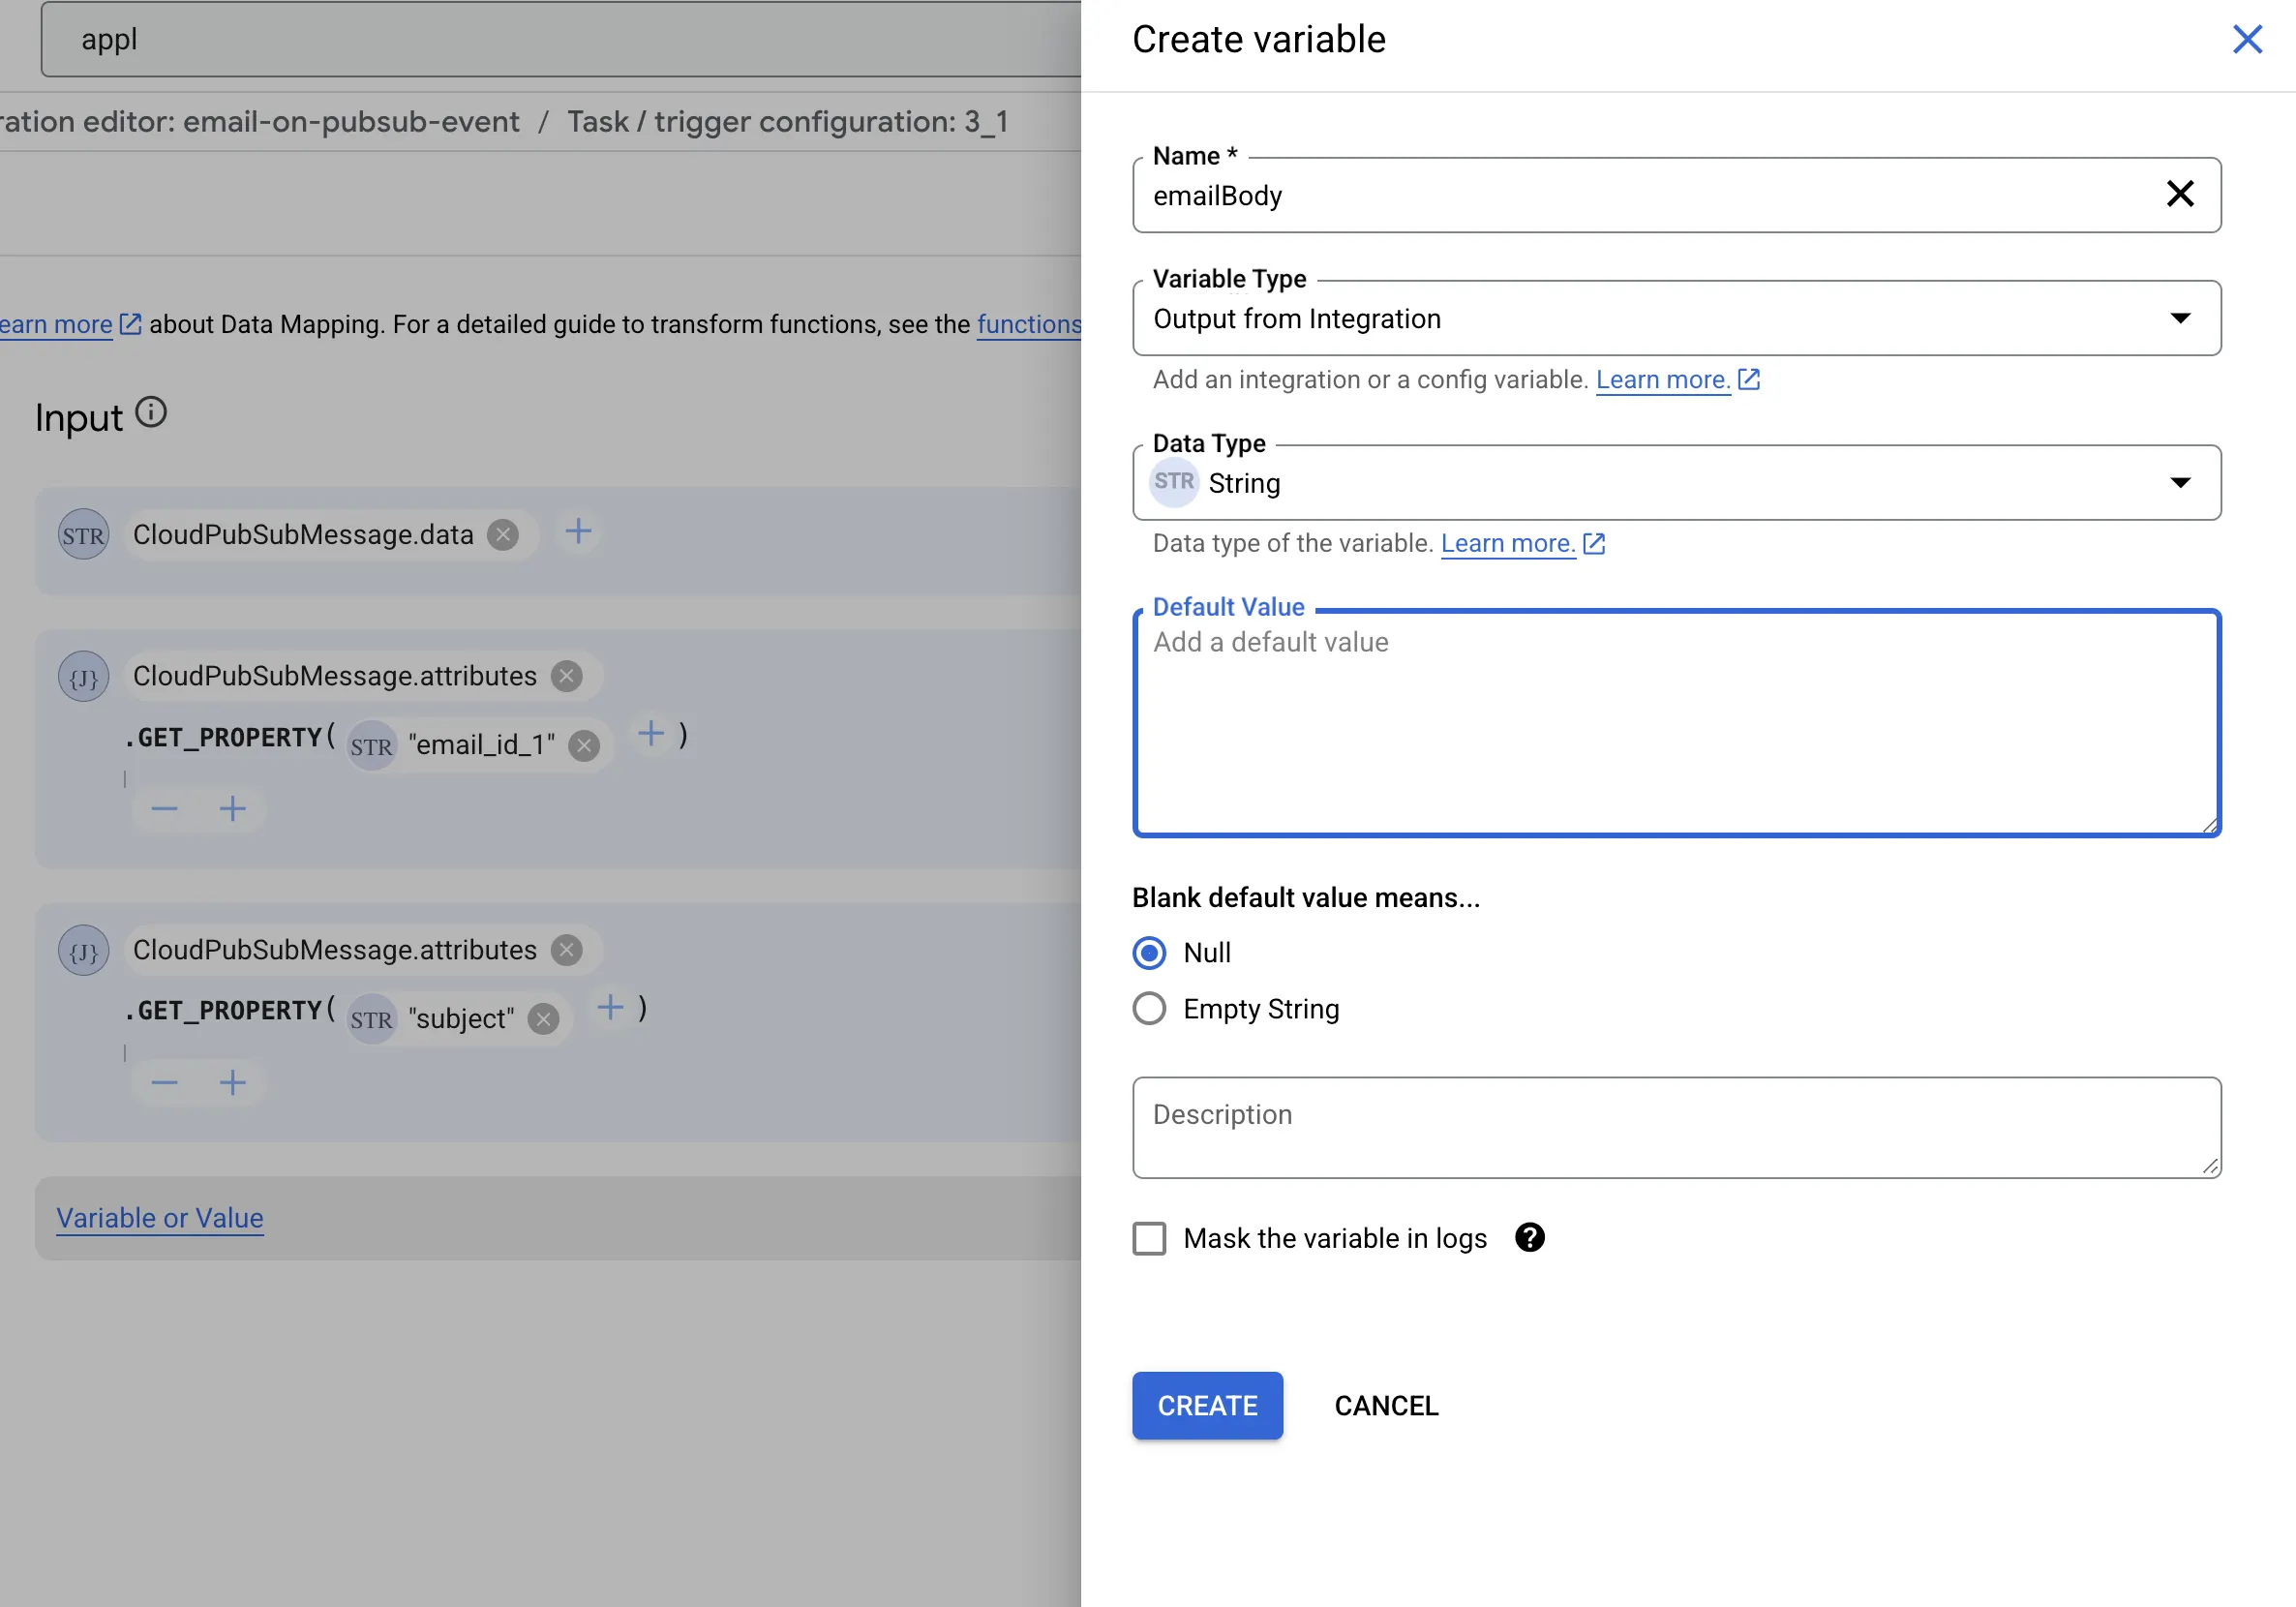
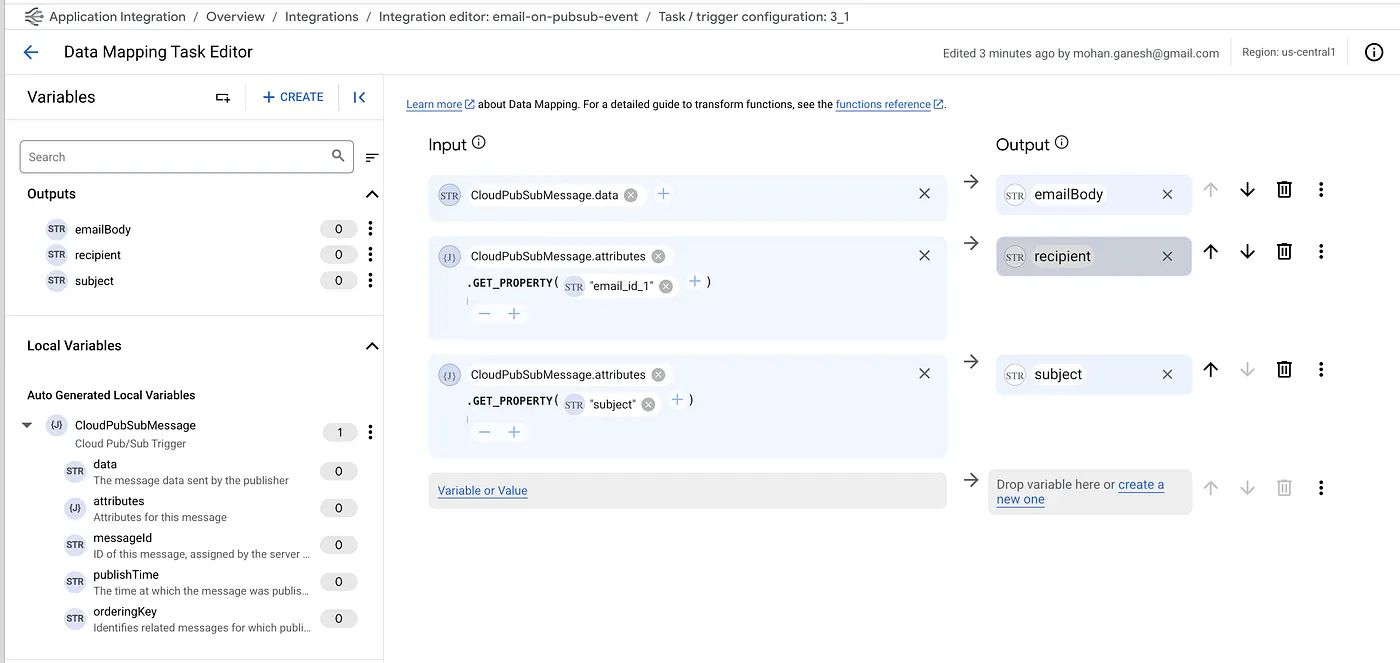
5. Extract Data from the Pub/Sub Message
To use data from the Pub/Sub message in the "Send Mail" task, we need to extract it first.
- Add a "Data Mapping" task before the "Send Mail" task.
- In the "Data Mapping" task, you can extract the data from the Pub/Sub message and store it in variables. The Pub/Sub message data is available in the `trigger_payload` variable.
- For example, if your Pub/Sub message is a JSON object with the following structure:
{ "to": "recipient@example.com", "subject": "Hello from Application Integration", "body": "This is a test email." } - You can extract the "to", "subject", and "body" fields into variables.
6. Use the Variables in the Send Mail Task
Now you can use the variables you created in the "Send Mail" task.
- In the "Send Mail" task configuration, use the variables for the "To", "Subject", and "Body" fields.
7. Test the Integration
To test the integration, publish a message to the "email-automation-topic" Pub/Sub topic.
gcloud pubsub topics publish email-automation-topic --message '{ "to": "YOUR_EMAIL@example.com", "subject": "Test Email", "body": "This is a test email from Application Integration." }'You should receive an email shortly.
Conclusion
In this article, we have seen how to automate email workflows using Google Cloud Application Integration, Pub/Sub, and the Send Mail task. This approach provides a simple and powerful way to send emails without writing any code.
By leveraging Application Integration, you can build complex workflows that react to events in your GCP environment and automate communication with your users and stakeholders.
The same task can be achieved using Data Transformer in the next part of this series.